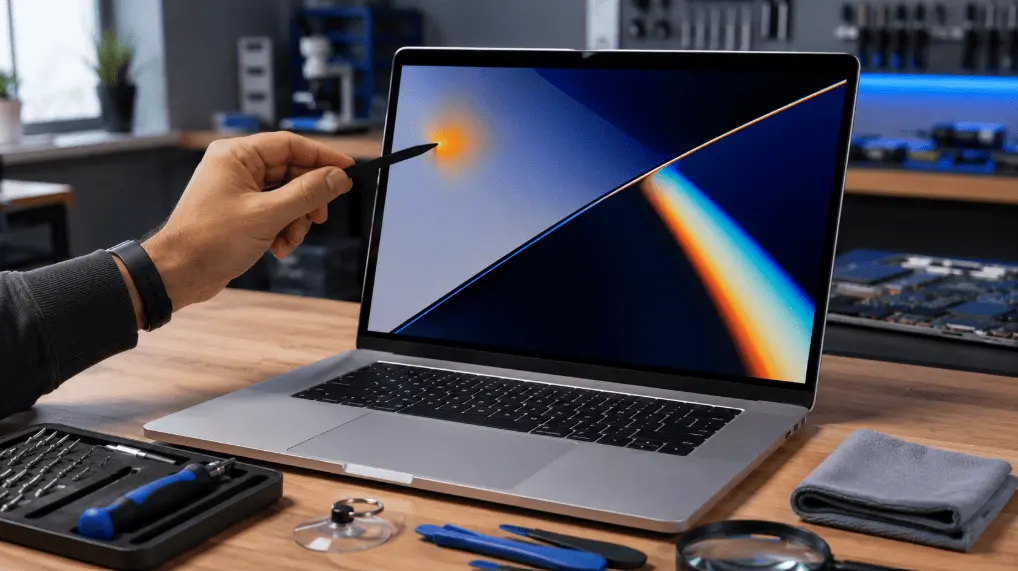
You open your MacBook expecting another productive day. Instead, your eyes immediately notice something strange. A faint orange spot on MacBook screen. It wasn’t there yesterday. It doesn’t disappear after restarting the computer, changing wallpapers, or adjusting brightness.
If that sounds familiar, you’re not alone.
An orange spot on a MacBook screen is one of the most common display problems Apple users encounter after several years of use. Depending on the cause, it may be completely harmless or the first sign of an expensive hardware failure.
The good news?
Many orange spots are easy to identify, and some can even be resolved without replacing the display.
In this guide, you’ll learn:
- Why orange spots appear on MacBook screens
- How to identify the exact cause
- Step-by-step troubleshooting methods
- Which fixes actually work
- When a display replacement becomes necessary
- Expected repair costs in 2026
- How to prevent the problem from returning
Whether you own a MacBook Air or MacBook Pro, this guide will help you determine the safest and most cost-effective solution.
Quick Answer
An orange spot on a MacBook screen usually indicates a hardware issue rather than a software problem. The most common causes include LCD pressure damage, heat exposure, liquid damage, aging display adhesives, backlight problems, or panel defects. While software glitches can occasionally create temporary color abnormalities, persistent orange spots generally require hardware diagnosis.
Before trying any fixes, it’s a good idea to confirm that the orange spot is actually a display problem and not a software issue. You can test your MacBook screen online for dead pixels, color uniformity, backlight bleed, burn-in, and other display defects using our free screen testing tool.
Table of Contents
First: Check the Top-Right Corner
Before anything else, look at exactly where the orange mark is sitting. If it’s a small dot tucked into the top-right corner of the screen, near the camera, there’s a good chance it’s not a fault at all. macOS shows an orange indicator light there whenever an app is actively using your microphone (a green one does the same for the camera). It’s a privacy feature, not a glitch.
Quit any apps that might be listening in the background- video call software, voice assistants, screen recorders- and see if the dot disappears. If it does, you’re done. No repair needed, no further troubleshooting required.
If the spot is anywhere else on the screen, doesn’t move, or stays lit even with every app closed, it’s a real display issue. Keep reading.
What Actually Causes an Orange Spot on MacBook Screen?
Before attempting any fix, it’s important to understand what’s happening beneath the glass.
Modern MacBooks use high-resolution Retina or Liquid Retina displays made up of multiple delicate layers. These include:
- Protective glass
- Polarizer
- LCD or Mini-LED panel
- Color filters
- Backlight system
- Display controller
If any one of these layers becomes damaged or begins to deteriorate, the result may appear as an orange, yellow, or brown patch.
Here are the most common causes. Orange or amber discoloration on a laptop display usually comes down to one of these:
1. Pressure damage.
This is by far the most frequent reason. MacBook displays are extremely thin. Even minor pressure can permanently damage the LCD. Common examples include:
- Closing the lid with earbuds inside
- Carrying the laptop under heavy books
- Sitting on a backpack containing the MacBook
- Pressing hard while cleaning the display
Pressure damages the liquid crystal layer beneath the glass, creating permanent discoloration that often looks orange or yellow.
2. Backlight degradation or bleed
Your display doesn’t generate light by itself. Instead, LEDs illuminate the LCD from behind. If part of the backlight begins aging unevenly, you may notice:
- Orange glow
- Yellow corners
- Warm-colored patches
- Uneven brightness
Backlight issues often become more obvious when viewing:
- White webpages
- Blank documents
- Bright wallpapers
3. Heat Damage
MacBooks naturally become warm during demanding tasks. However, prolonged exposure to excessive temperatures can affect the display components.
Examples include:
- Rendering videos for several hours
- Gaming with blocked ventilation
- Leaving the MacBook inside a hot car
- Direct sunlight exposure
Heat gradually weakens the display adhesives and polarizing layers, creating localized discoloration.
4. Liquid or moisture damage
Even tiny amounts of moisture can affect the display. Many users assume only large spills cause problems. In reality:
- Coffee splashes
- Rain
- Humidity
- Cleaning sprays
- Condensation
can seep into the display assembly. Once moisture reaches the LCD layers, minerals begin interfering with light transmission.
5. Aging Display Adhesives
Older MacBooks sometimes develop orange patches without any obvious accident. One overlooked reason is adhesive degradation. Over years of heating and cooling cycles, the bonding materials holding display layers together slowly deteriorate.
This commonly affects laptops that are:
- Five years old or older
- Used daily
- Frequently exposed to high temperatures
Unlike pressure damage, adhesive issues often expand gradually over several months.
6. LCD Manufacturing Defects
Although uncommon, manufacturing defects do occur. Some panels develop discoloration because of:
- Uneven liquid crystal alignment
- Polarizer defects
- Backlight inconsistencies
- Internal contamination
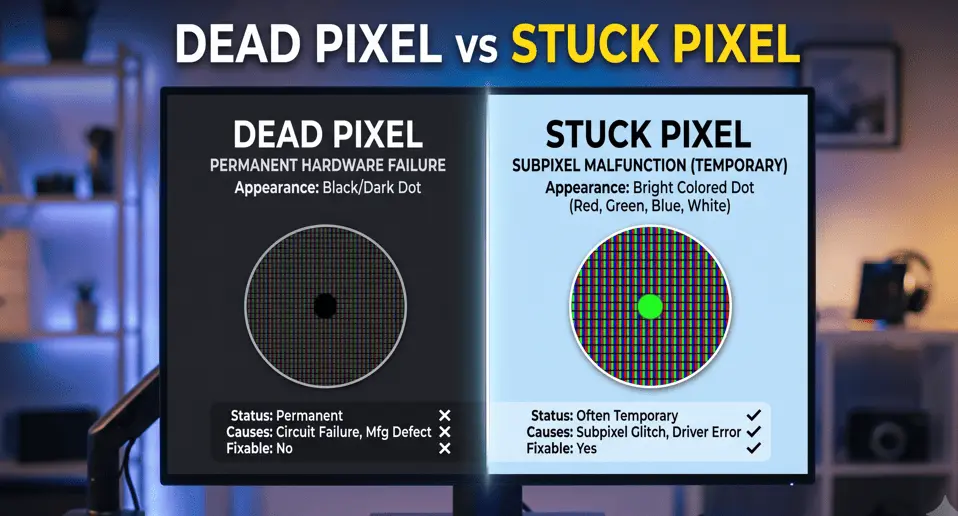
If the discoloration appears shortly after purchase without any signs of physical damage, it could be a manufacturing defect. However, if the mark looks like a tiny orange dot instead of a larger patch, compare the symptoms with dead pixels vs stuck pixels, as the two problems are often confused.
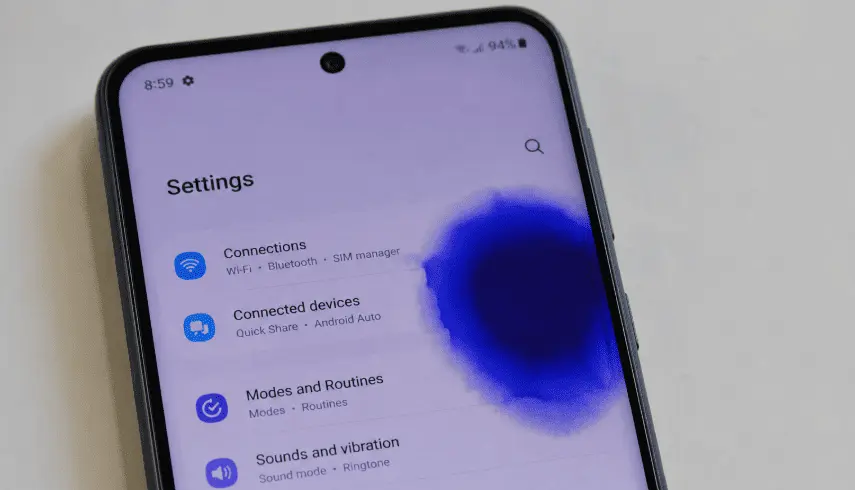
Not every color patch is a defective pixel. A larger area may indicate a panel issue, such as a blue patch on a mobile screen caused by pressure, moisture, or display damage.
7. Physical Impact
Not every damaged screen cracks. Sometimes the internal LCD absorbs the impact while the outer glass remains intact. This often happens after:
- Dropping the MacBook
- Hitting the display edge
- Twisting the lid
- Transport accidents
Internal fractures often appear as orange or yellow stains before developing into larger black patches. Depending on the severity of the impact, you may also notice black lines on a laptop screen, flickering, or display distortion.
8. A stuck or defective pixel cluster
Less common as the cause of a visible “spot” (this usually looks more like a tiny dot than a patch), but manufacturing defects or age-related pixel failure can produce a fixed-color mark. A cluster of pixels stuck on the same color is rare, so if what you’re seeing is a small, sharply defined orange dot rather than a soft blotch, this is often the actual explanation.
10. Screen burn-in
Static images left on screen for long stretches at high brightness, a pinned taskbar item, a paused video, or a menu bar icon can, over time, permanently affect the pixels underneath. This shows up as a faint but fixed discoloration in that exact shape.
11. A loose display connector or logic board issue
If the spot shifts, flickers, or is joined by other display oddities- flickering, lines, color banding- the cable connecting the display to the logic board, or the graphics hardware itself, may be the actual culprit.
11. Adhesive breakdown
On newer MacBooks with laminated Retina or Liquid Retina displays, the layers of glass and LCD are bonded with adhesive. That adhesive can degrade with age or heat, and the result often looks like a soft, glowing bruise under the surface rather than a hard-edged mark.
12. Battery swelling
This one’s easy to miss because it doesn’t look like a display problem at first. On most MacBooks, the battery sits directly beneath the keyboard and trackpad, right below the palm rest, close enough to the display assembly that as a battery ages and starts to swell, the upward pressure it puts on everything above it can damage the backlight and LCD layers from underneath.
It’s worth checking regardless, because a swollen battery is also a fire and safety risk on its own, not just a screen issue. Hold Option and click the battery icon in the menu bar to see your battery’s condition; anything other than “Normal” (Service Recommended, Replace Soon, Replace Now) is worth acting on, and if you can see or feel any bulging at the trackpad or keyboard, stop using the machine and get it looked at rather than waiting.
Replacing the screen without addressing a swollen battery underneath damages the new one the same way, which is why a battery-caused orange spot on a MacBook screen needs the battery fixed first, not just the display.
Notice that most of these are physical, not software. That’s an important context for what to try next; you’re not chasing a bug, you’re ruling one out.
Software Checks Worth Ten Minutes of Your Time
Even though most causes are hardware-related, it’s worth ruling out the handful of things software can actually cause or mask, because the fix takes minutes and costs nothing.
- Turn off Night Shift and True Tone. Go to System Settings → Displays, and switch both off. True Tone in particular adjusts color temperature based on ambient light, and on a display that’s already borderline, it can make a faint issue look more orange than it really is.
- Recalibrate your display. Still in Displays, open Color and run through Calibrate. This resets minor color profile issues that occasionally masquerade as physical discoloration.
- Reset NVRAM/PRAM. Restart your Mac and immediately hold Option + Command + P + R for about 20 seconds before releasing. This clears stored display settings that can occasionally cause color weirdness.
- Reset the SMC. On Apple Silicon and recent Intel Macs, shut down completely, then hold Control + Option + Shift on the left side for 7 seconds, press the Power button, and hold all four for another 7 seconds. This resolves some backlight and power-related display glitches. (Older MacBooks with removable batteries use a different combination; check your exact model if this doesn’t apply to you.)
- Boot into Safe Mode. Hold Shift while restarting. If the spot disappears in Safe Mode, a third-party app or driver is the culprit, not your hardware; uninstall anything you added recently and test again.
- Try a pixel-fix tool. If the mark looks like a genuinely tiny, sharply defined dot rather than a soft patch, a color-cycling tool (JScreenFix is a well-known free one) run for 15–20 minutes can occasionally unstick a single pixel. It won’t do anything for a broader discoloration patch, so don’t expect miracles here.
If none of this moves the needle, you’re looking at a hardware issue.
How to Fix an Orange Spot on a MacBook Screen? : Software Steps First
Even though most causes are hardware-related, it’s worth ruling out the handful of things software can actually cause or mask, because the fix takes minutes and costs nothing. The exact steps split depending on your chip, so check first: Apple menu → About This Mac, and look at the chip line. If it says M1, M2, M3, M4, or later, you have Apple Silicon. If it says Intel, the older key-combo resets still apply to you.
Turn off Night Shift and True Tone:
Go to System Settings → Displays, and switch both off. True Tone in particular adjusts color temperature based on ambient light, and on a display that’s already borderline, it can make a faint issue look more orange than it really is. This step is identical on every Mac.
Check Color Filters in Accessibility:
This one catches more people than you’d expect. Go to System Settings → Accessibility → Display → Color Filters. If it’s toggled on, whether you did it, someone else was using the Mac, or you were poking around accessibility settings and forgot, it can tint the entire screen orange, yellow, or another color, and it’s a one-click fix once you know to look.
Recalibrate your display
Still in Displays, open Color and run through Calibrate. This resets minor color profile issues that occasionally masquerade as physical discoloration.
Reset NVRAM/PRAM and SMC, Apple Silicon (M1/M2/M3/M4)
There’s no key combo here, and that’s not a step I’m skipping. Apple Silicon Macs genuinely don’t have a manually resettable SMC anymore, and NVRAM is checked and cleared automatically on every boot. The equivalent fix is: Shut down completely (Apple menu → Shut Down), wait about 30 seconds, then press the power button to start back up. If that doesn’t help, do it once more but leave it off for a full minute.
Reset NVRAM/PRAM and SMC, Intel Mac
For NVRAM: restart your Mac and immediately hold Option + Command + P + R for about 20 seconds before releasing. For the SMC, the combo depends on your exact model; Intel MacBooks with the T2 security chip (most models from 2018 onward) use Shift + Control + Option (the left-side keys) plus the Power button held together for 10 seconds; older MacBooks with a removable battery use a different sequence entirely, so check your specific model before trying it.
Boot into Safe Mode
On Apple Silicon: shut down, then press and hold the power button until “Loading startup options” appears, choose your volume, then hold Shift while clicking Continue in Safe Mode. On Intel: restart and immediately hold Shift. If the spot disappears in Safe Mode, a third-party app or driver is the culprit, not your hardware; uninstall anything you added recently and test again.
Try a pixel-fix tool.
If the mark looks like a genuinely tiny, sharply defined dot rather than a soft patch, a color-cycling tool (JScreenFix is a well-known free one) run for 15–20 minutes can occasionally unstick a single pixel. It won’t do anything for a broader discoloration patch, so don’t expect miracles here.
If none of that clears it, run these three free tests before you spend a dollar on anything; together they tell you not just whether it’s hardware, but which kind:
The screenshot test
Take a screenshot of the screen with the spot visible (Shift-Command-4, then drag), and open the saved image. If the orange spot shows up in the screenshot, it’s part of what your Mac is rendering, a software or graphics-driver issue, not a physical fault. If the screenshot looks completely clean and the spot is only visible when you look at the actual screen, that confirms it’s physically on the display panel.
The lid-angle test
With the Mac awake, slowly open the lid past its normal working angle, toward 100–110 degrees, and watch the orange spot as you move. Display panels are physically fixed, so if the spot doesn’t respond at all to lid angle, that points to the panel or backlight itself. If it visibly shifts, fades, or intensifies as the angle changes, that points to the display cable running through the hinge instead, which matters because a cable is a much cheaper repair than a full panel.
The external monitor test
Connect the MacBook to an external monitor or TV and mirror the display (AirPlay works too if you don’t have the right cable). If the spot shows up there as well, the problem is upstream of the panel, the GPU or logic board, not the screen itself. If the external display looks completely normal, the fault is isolated to the built-in panel.
If you want a more formal read after those three, Apple’s built-in Apple Diagnostics tool will scan the hardware and return a reference code. The steps differ by chip: on Apple Silicon, shut down, then hold the power button until you see the startup options screen, release, and press Command + D. On Intel, turn the Mac on and immediately hold D until you see a progress bar or a language prompt.
If none of this moves the needle, you’re looking at a hardware issue.
Should You Try the “Push the Spot” Trick?
If you search around, you’ll find people claiming that gently pressing on the screen near the spot, or applying light warmth with a hairdryer, can temporarily shift or shrink the mark. Some users report it working, briefly.
I’d skip it. You’re applying pressure or heat to a display that already has damage from pressure or heat. Best case, you get a short-lived cosmetic improvement. Worst case, you turn a repairable spot into a cracked panel, and if your Mac is still under warranty or AppleCare, you’ve just voided it by tampering with the screen yourself. It’s a workaround for people who’ve already decided they’re not fixing it properly, not a real fix.
When It’s a Hardware Problem
If you’ve gone through the software checks and the orange spot on your MacBook screen is still there, still in the same place, and hasn’t budged — treat it as a hardware fault. A few signs that point clearly toward hardware rather than software:
- The spot grows slowly over days or weeks
- It’s more visible on dark screens or in low light (points to backlight)
- It appeared shortly after the laptop was dropped, sat on, or carried under pressure
- It’s accompanied by flickering, lines, or the screen going dark intermittently
- It appeared after any exposure to spills, humidity, or heat
None of these are something a software reset fixes, and continuing to use the machine without addressing it usually means the spot spreads rather than stays put.
How to Fix an Orange Spot on MacBook Screen Caused by Hardware Damage
If the orange spot on your MacBook screen remains after completing the software checks, it’s most likely caused by physical damage inside the display. The right repair depends on what’s actually failed, so identifying the cause first can save you time and money.
1. Confirm the Cause
Before replacing any parts, use the troubleshooting tests covered earlier in this guide.
- If the orange spot only appears on the built-in display and not on an external monitor, the issue is almost certainly the MacBook’s display.
- If the spot stays in the same location regardless of brightness, wallpapers, or lid position, the LCD panel, backlight, or display assembly is likely damaged.
- If the spot changes, flickers, or shifts when you move the lid, the display flex cable may be worn or damaged.
Identifying the failed component helps prevent unnecessary repairs.
2. Replace the Damaged Display Components
Unlike software issues, physical display damage cannot be repaired by resetting macOS.
Depending on the cause, the repair may involve replacing:
- The display flex cable if it has been damaged near the hinge.
- The complete display assembly if the LCD panel, backlight, or laminated display layers have been affected by pressure, heat, liquid, or impact damage.
Because modern Retina and Liquid Retina displays are laminated, Apple and most repair shops replace the entire display assembly rather than individual layers.
3. Check AppleCare+ Before Paying for Repairs
If AppleCare+ covers your MacBook, accidental display damage is usually repaired for a much lower service fee than an out-of-warranty screen replacement.
If your MacBook is still under Apple’s Limited Warranty and a manufacturing defect causes the discoloration, the repair may also be covered.
4. Choose a Reliable Repair Provider
Whether you visit Apple or an independent repair shop, ask the technician to identify the exact cause before replacing the display.
A reputable repair center should confirm whether the problem is related to the:
- LCD panel
- LED backlight
- Display flex cable
- Display controller
- Liquid damage
Also ask whether they use genuine Apple or OEM-quality replacement parts, as low-quality displays can affect True Tone, brightness, and color accuracy.
5. Is It Worth Repairing?
For older MacBook models, compare the repair cost with the current value of the laptop.
If the display replacement costs nearly as much as a newer or refurbished MacBook, replacing the device may offer better long-term value. However, for newer MacBook Air and MacBook Pro models, repairing the display is usually the more cost-effective option.
Tip: Orange spots caused by pressure damage, liquid damage, heat exposure, or adhesive failure usually become larger over time. Repairing the display early can prevent further deterioration and help avoid additional hardware damage.
Repair or Replace: What It Actually Costs You
If you’re under AppleCare+, this is the easy case: book a service appointment and let Apple or an authorized provider handle it. Accidental damage (which covers most pressure and impact cases) is typically covered for a service fee that’s a fraction of an out-of-warranty repair.
Outside of AppleCare, you’re generally choosing between an Apple or authorized service center repair and a third-party repair shop. Apple’s official repair tends to cost more but comes with a guarantee that you’re getting a proper display assembly and a technician who won’t void anything else on the machine. Third-party shops can be considerably cheaper, especially for older or out-of-production models, but quality varies a lot; ask specifically whether they use genuine or OEM-equivalent panels, since some cheaper replacements introduce their own color accuracy and True Tone issues.
If your MacBook is older and the repair cost starts creeping toward what a used replacement of the same model would cost, that’s worth factoring in too. A screen replacement on an aging machine isn’t always the best use of the money, especially if the battery and other components are also nearing the end of their useful life.
How to Stop It From Happening Again
Most of the causes above are avoidable with a few habits:
- Never place anything on top of a closed laptop, and be mindful of what’s in the same bag compartment (a charger cable, a phone, a set of keys pressing into the lid over time adds up)
- Avoid leaving the MacBook in a hot car or in direct sun for extended periods, and if you regularly run demanding tasks, a laptop cooling pad or simply propping it up for airflow reduces the heat buildup that stresses the display over time.
- Keep drinks well clear of the keyboard, and if a spill happens near the hinge, power down immediately rather than continuing to use it.
- Close the lid gently rather than letting it drop shut, particularly on models with thinner display assemblies.
- If you use a sleeve or case, make sure it doesn’t apply pressure directly to the lid when the laptop is inside a packed bag.
None of this guarantees you’ll never see a spot; some of this comes down to component aging that’s outside your control, but it removes the most common triggers.
Frequently Asked Questions
Does an orange spot mean my MacBook is dying?
No. It almost always means the display specifically has an issue, not the rest of the machine. The logic board, storage, and battery are typically unaffected unless the spot is a symptom of a much broader liquid or impact event.
Will orange spot on my macbook screen spread if I ignore it?
Often, yes, especially if it’s caused by pressure damage or backlight degradation; both tend to progress rather than plateau. Liquid-related spots can also spread as moisture migrates further under the glass.
Can I fix it myself without opening the laptop?
If it’s one of the software-related causes above (True Tone, Color Filters, a stuck pixel), yes. If it’s a genuine hardware fault, including a swollen battery, no. MacBook displays are laminated assemblies that aren’t designed for a DIY fix, and opening one without the right tools usually causes more damage than it solves.
Is this covered under standard Apple warranty, not just AppleCare+?
Standard warranty covers manufacturing defects but generally not accidental damage like pressure or drop damage. If the spot appeared with no clear external cause and your Mac is still within its first year, it’s worth getting it assessed; it may qualify.
Does screen protector film help prevent this?
It won’t do much for internal backlight or adhesive issues, but a well-fitted keyboard cover that keeps debris and moisture away from the hinge area, plus basic care around what touches the closed lid, addresses the two most common triggers.
The Bottom Line
Start with the ten-minute checks, the privacy dot, Color Filters, Night Shift and True Tone, an NVRAM and SMC reset, and Safe Mode. If any of those clear it, you’ve saved yourself a repair bill entirely. If the orange spot on your MacBook screen survives all of that, run the screenshot and lid-angle tests; they’ll tell you not just that it’s hardware, but which repair you actually need, so you walk into any shop already knowing whether you’re paying for a cable or a full display.